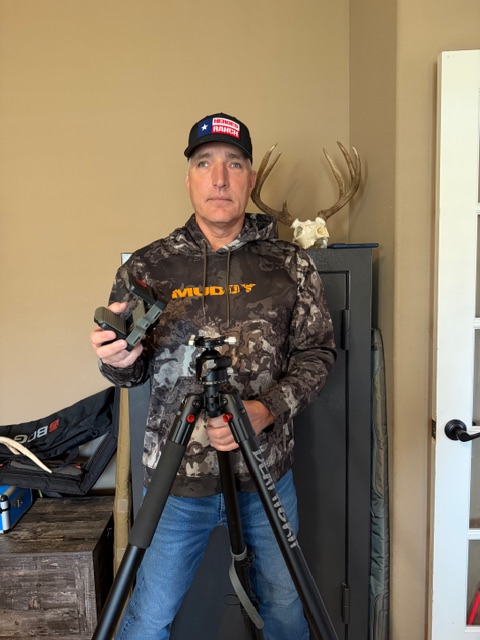
In the photo, my left hand is touching a newly installed Barker Outdoors adapter mounted on a Bog DeathGrip tripod and I hold the BOG saddle clamp mount in my right hand.
Benefits
The Barker Outdoors BOG adapter ballhead will allow for full range of motion, smoother movements and better lock down capabilities when on target. It also reduces total weight by approximately two pounds. Get yours at the Barker Outdoors store.
Assembly And Instructions
Assembly is so easy you can probably do it with your eyes closed. I did, but also used an Aira Visual Interpreter to read the included paper instructions and verify my understanding of a few steps before proceeding. Visual verification was especially important before pounding out the original bushings because proceeding with brute force during some prior projects has resulted in non-reversable damage and subsequent ordering of replacement parts.
The new adapter replaces much of the original BOG equipment. I only included the steps and hardware that I used to assemble. There are other features that you can learn more about at the Barker Outdoors store.
Step 1 – Removing the stock saddle, bearings, bushings and shaft.
- Pull off rubber plug on the bottom bolt
- Using an Allen wrench loosen and remove bottom bolt
- Pull entire assembly (including bushings) off
- Use flat screwdriver to pound out the original bushings in the tube
Step 2 – Installing conversion adapter and ballhead.
- Place the conversion adapter through the bottom
- Attach the nut and tighten with wrench
- Attach the ballhead to the 3/8″ exposed screw
- Tighten the base knob of the ballhead pan feature to tighten ballhead to the screw
- If you are using pan feature, release tension to allow the base to pan at all times (if bottom pan is tight the ballhead could release from the screw).
- I do not plan to use pan features, so I will use locking thread paste to help secure ballhead.
Step 3 – Installing saddle arca plate to original saddle.
- Using an Allen wrench, remove the four bolts connected to the bottom of the saddle
- Take the shaft and set it aside, you will no longer need this part
- Install the saddle arca plate using the 4 original bolts and tighten with an Allen wrench
- To use the saddle, simply place the saddle on top of the ballhead and tighten the top plate knob until tight
- The saddle can be quickly detached and reattached as needed.
Dead Eyes Getting Better Mission
In a prior post, you learned that the Dead Eyes duo returned home from Heroes Ranch with the mission to get better. Check out the Heroes Ranch category for additional posts that feature the getting better theme. In addition, future posts in the Hunting category will feature use of this better gear at the range and in the field.

Leave a comment